It’s week fifteen of 52 Weeks for Earth, the 52-week challenge to gradually reduce your impact on the planet. In our ongoing effort to reduce our food-related climate change emissions, this week I’ll show you how to start your own compost.
Last week we talked about the important reasons you should keep your food waste out of landfill. If you missed that here’s a roundup: organic matter like food waste that is wrapped in plastic and buried in landfill is forced to decompose without oxygen. This anaerobic condition produces methane, a greenhouse gas 20x more powerful at trapping heat than carbon dioxide.
Currently 20% of everything that goes into municipal landfill is food, so this is a huge problem. But it doesn’t have to be. There’s plenty of alternatives to sending food to landfill, as outlined last week. This week I’m going to show you an easy, do-it-yourself, indoor composting method; vermicompost!
Vermiculture is a composting system that relies on worms to aid in the decomposition process of food and organic matter. The end result is ‘vermicompost’, a nutrient-rich material that can be used as fertilizer for growing food and plants.
Who’s ready to play with worms?! (I’m kidding, you never have to touch the worms, please don’t be afraid!)
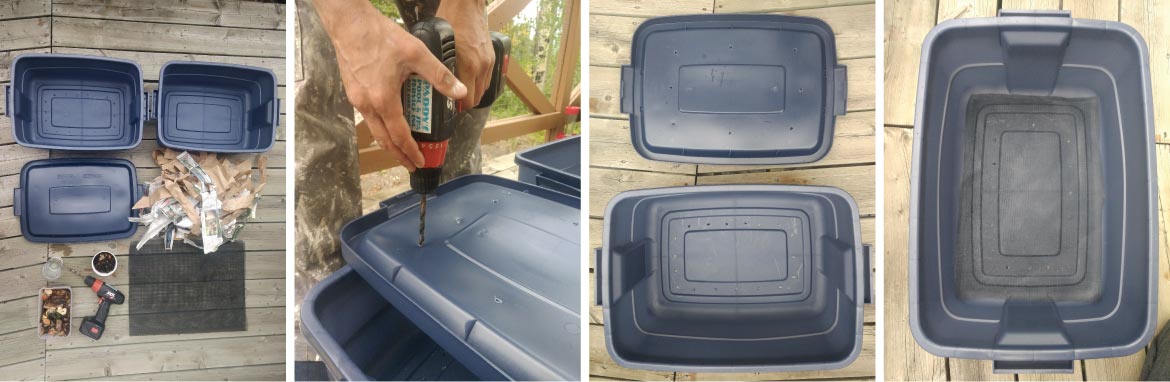
1. Collect the materials
You will need:
- Container, or worm bin. There’s a variety of options, homemade wood or plastic boxes, galvanized garbage cans, and commercial vermicomposting bins. Try use what you already have on hand, and avoid buying new plastic if possible.
- Bedding, such as torn newspaper, shredded corrugated cardboard, brown leaves/straw, egg cartons, non-glossy paper, other chemical-free things able to hold moisture, allow air exchange and host the worms.
- Water (left out overnight to evaporate any chlorine).
- Worms, specifically red wigglers, I got mine from a friend who introduced me to vermicomposting. If you don’t know any worm keepers try some local buy & sell or gardening Facebook groups before buying online.
- Soil just a couple handfuls of garden soil will do
- A drill, or something to make holes in your container if it is closed.
- Some mesh optional to cover those holes. I used off-cuts of flyscreen I got from a friend.
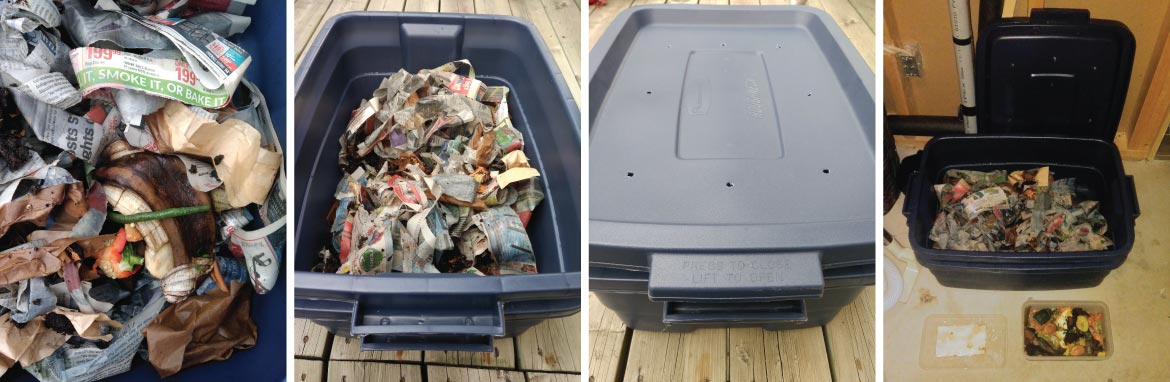
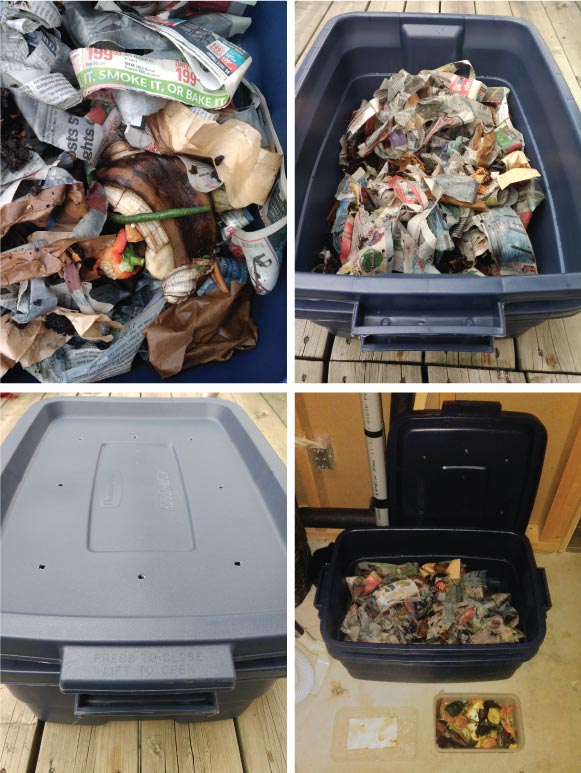
- And your food scraps! Designate a specific airtight container to keep close-at-hand in the kitchen for food waste collection.
You will also need a place to put your compost, somewhere out of the direct sun, with a regulated temperature (don’t let them freeze over winter), that will be convenient to visit a couple times a week. Luckily the bin doesn’t take up much room, so you should be able to find a place, even in a small space; it just might not be where people expect to find worms! I keep mine in the laundry because it’s dark and maintains a consistent temperature.
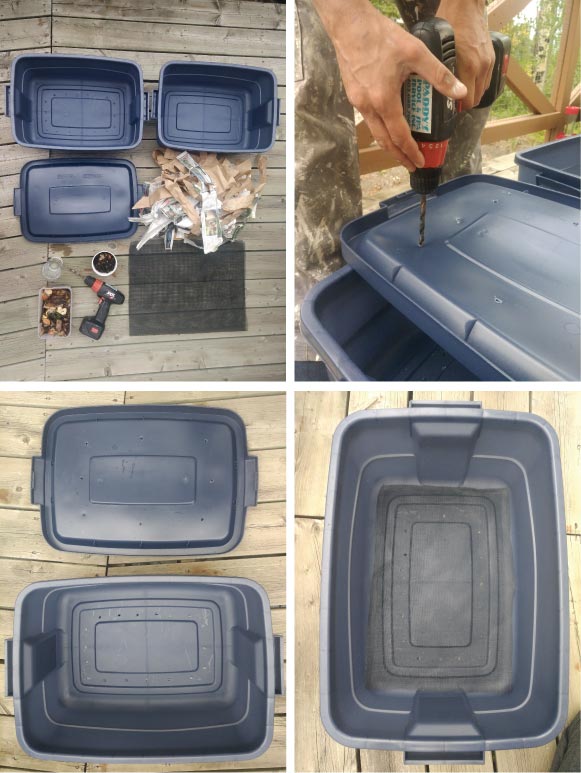
2. Prepare your worm bin
Here I’m using two 38L plastic tubs. As they’re plastic I’m first going to rinse them thoroughly. I’m using two containers stacked so that I can drain the liquid produced by the vermicompost (or ‘worm pee’) from the top container into the bottom container. To do so, I’ve drilled a series of holes into the bottom of the container. I’m also going to drill some holes into the lid of the container so that the compost can be well ventilated (my drill battery died, I’ll likely add more than seen in the photos).
TIP: Don’t worry about the holes letting out odors, if your compost is healthy it will have little to no odor. If it’s smelling, it is likely because air isn’t circulating, or you’ve added too much food. When your compost lacks sufficient air, anaerobic organisms will begin to take over (just like with food in landfill), and will produce a bad odour (like methane!).
We’ll use the mesh to cover the bottom holes, so the composting materials don’t fall through. And to cover the holes at the top, to keep any other critters out.
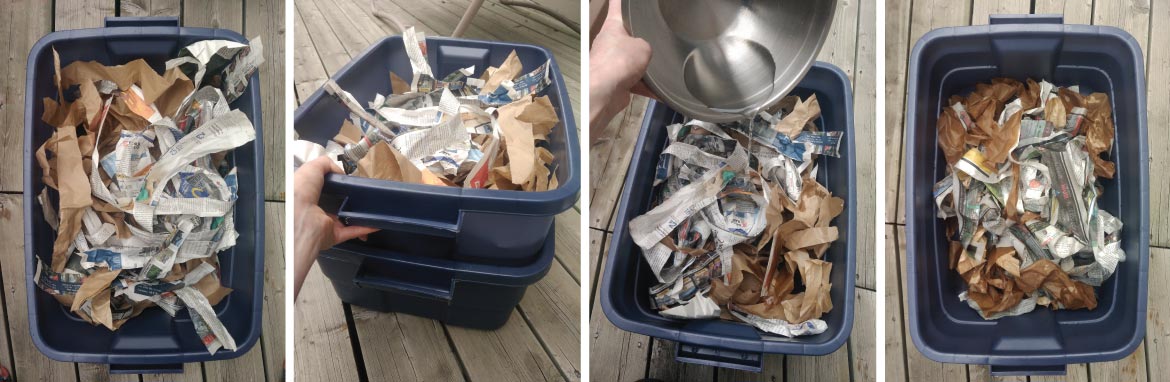
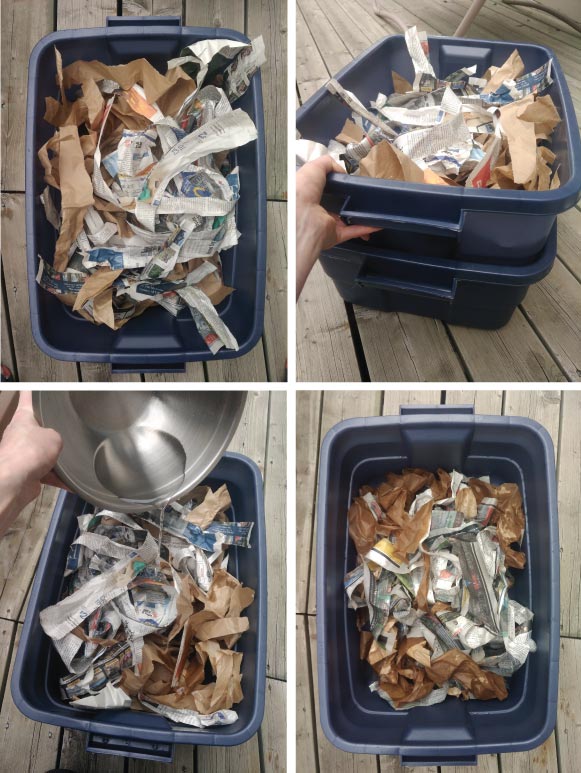
3. Add your bedding
Add enough bedding to fill your container, once wet it should shrink to fill your container halfway. If it doesn’t add more. Worms bodies are 75% – 90% water, so your bedding must be a similar dampness for them to breathe. Therefore, you should add roughly 3 times the weight of your bedding in water.
4. Adding your worms
Once your bedding is wet enough you can scatter your worms on top of the bedding. Do this under direct lighting so the worms will borough into the bedding. Once they’re gone from sight you can add the lid and let them settle in for a day before adding food.
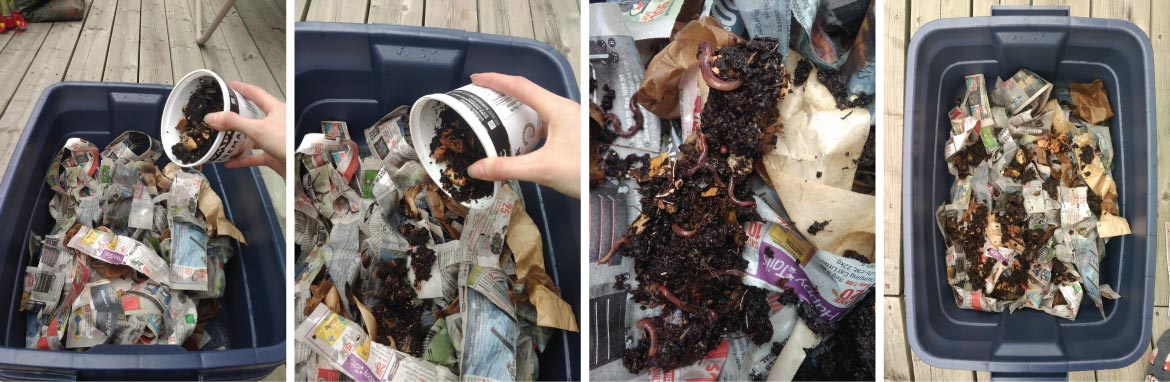
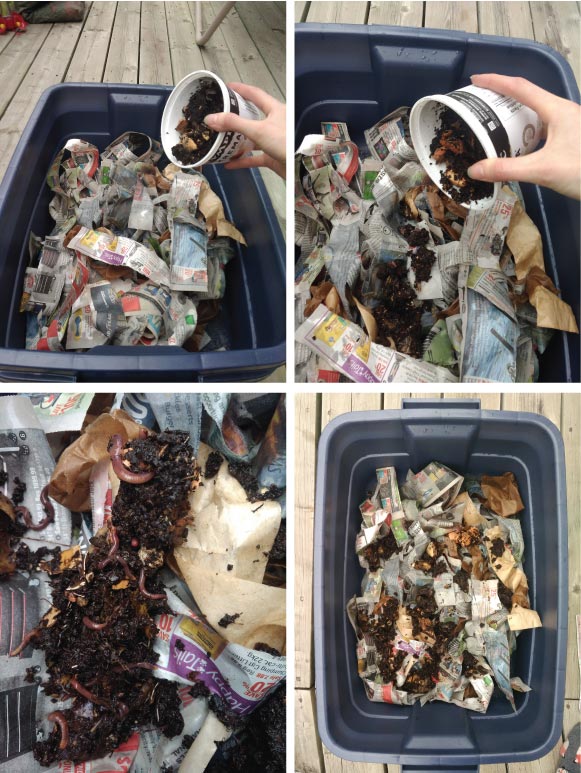
5. Feeding your worms
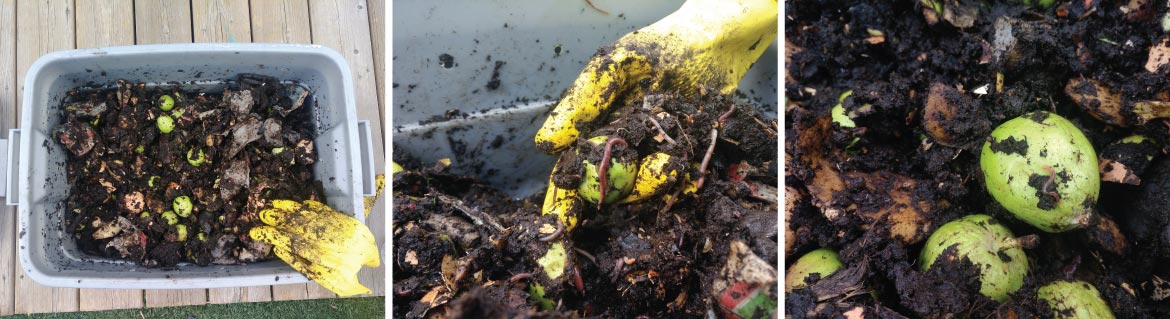
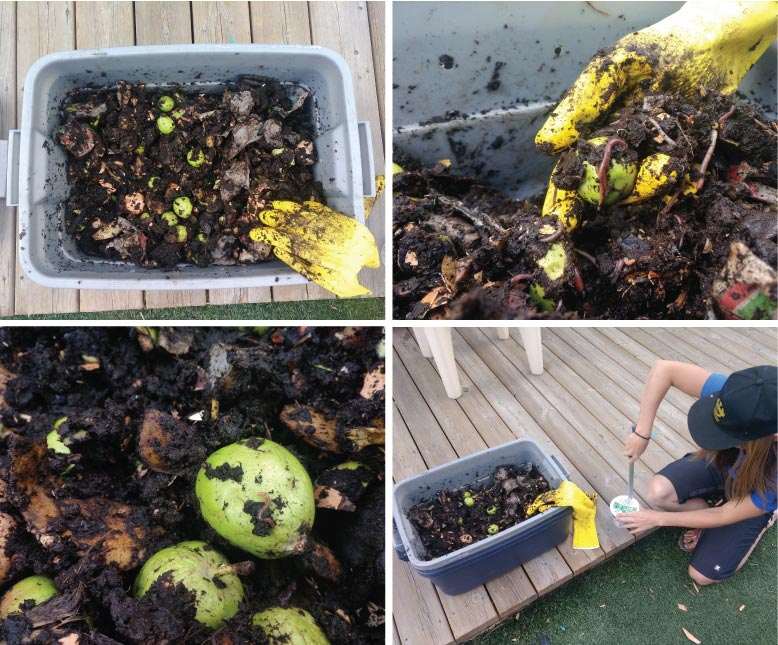
You might want to start with a small amount of food waste to see how they do. Dig a hole and add food waste, before covering in 10-15cm of bedding. Check back in a couple days, and feed again in about a week. You’ll find your vermicompost capacity for food with increase over time if your worms are happy and multiplying. Ensure you mix the contents up often to ensure the compost as adequate aeration. A pair of rubber kitchen gloves will come in handy for handling and mixing!
Along the way you might need to add more bedding, if your compost is looking too wet, starting to produce and odor, or if your compost has become less habitable for your worms and you aren’t yet ready to harvest.
What to feed them
Worms will eat any food and organic material (cotton, dust, wooden utensils, etc). Avoid adding meat and animal products, as these can cause odors and attract rodents. Don’t add too much citrus at a time, as it can become too acidic for the worms. And never add anything nonbiodegradable, like plastic (watch stickers on your produce), foil, glass, etc.
6. Harvesting your vermicompost
Once you’ve had for vermicompost going for a few months you’ll start to see the level of the contents decreasing despite continuously adding more food. After about four to six months you can plan to harvest your vermicompost.
There’s two methods to harvest your vermicompost:
- Dump and Sort using a plastic sheet under direct lighting dump the contents of the compost out. Sort into pyramid shaped piles. Wait 10+ minutes for worms to crawl away from the light, remove top layer into another container, repeat. Once left with mostly just worms add to fresh bedding.
- Side to Side the less hands on method! Feed worms on one side of compost for several weeks. The worms will migrate to the side with a food source, at which point you can collect the casting from the vacant side. Replace with fresh bedding. Repeat on the opposite side.
Vermicomposting is a cheap, low-maintenance, compact and even fun way to ‘recycle’ your food waste. Say goodbye to a stinky kitchen bin and regular trips to empty it. Start producing rich fertilizer to grown more food. Feel free to reach out if you have any questions.
#52WeeksForEarth | Facebook: 52 Days for Earth
Thanks to Grace for the worms, and the introduction to vermicomposting. I only hope we can all be as good worm parents are you. Her happy worms are the final photos above.